
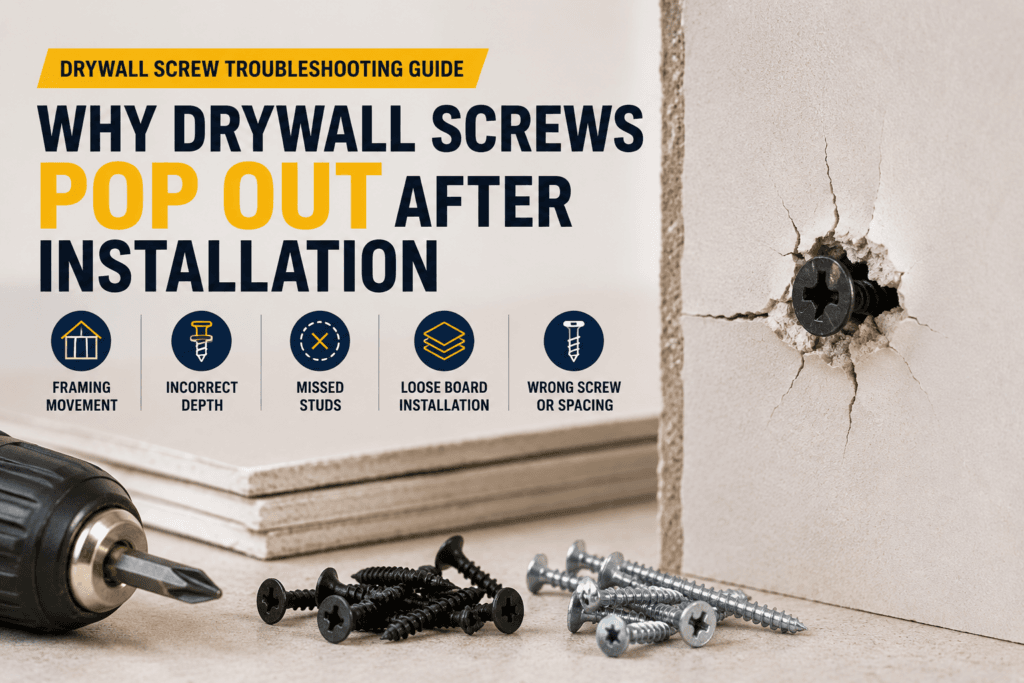
Why Drywall Screws Pop Out: 7 Common Causes and How to Prevent Them
Drywall screw pops are small raised spots that appear when a screw head becomes visible beneath the finished drywall surface.
They may appear as a circular bump, cracked joint compound, a small depression, or an exposed screw head.
One isolated screw pop may seem like a minor cosmetic problem. However, repeated screw pops can indicate movement in the framing, poor board contact, incorrect screw installation, or an ineffective fixing point.
The best approach is not simply to cover the mark again.
Identify the cause → inspect the fixing → correct the underlying problem → repair the finish.
Quick Answer
Drywall screws can pop out when movement occurs between the drywall board and framing, or when the original fixing does not hold the board securely.
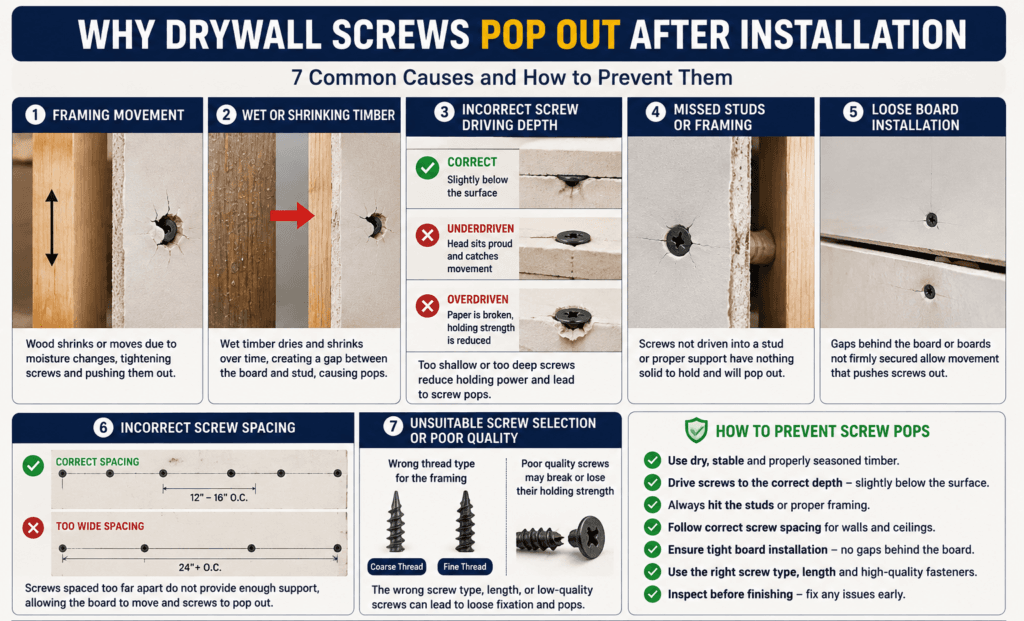
Common causes include:
- Framing movement
- Wet or shrinking timber
- Incorrect screw driving depth
- A screw missing the stud
- Poor contact between board and framing
- Incorrect screw spacing
- Unsuitable screw selection or fixing
A drywall screw pop is usually a symptom of movement or an ineffective fixing, rather than only a surface finishing defect.
What Is a Drywall Screw Pop?
A drywall screw pop occurs when the screw head creates a visible raised or damaged area beneath the finished drywall surface.
During correct installation, the screw head should form a shallow recess while the drywall paper facing remains intact. The fixing point can then be covered with joint compound.
If the board, screw, or framing moves later, pressure may develop around the screw head.
This can result in:
- A circular bump
- Cracked joint compound
- A visible screw head
- A small depression around the fixing
- Several pops appearing along the same framing line
Before repairing the surface, determine whether the problem comes from the screw, the board, or the framing behind it.
7 Common Causes of Drywall Screw Pops
1. Framing Movement After Installation
Movement in the framing is one common reason drywall screw pops can appear after installation.
Wood framing can expand, contract, twist, or settle as moisture and environmental conditions change.
When the framing moves while the drywall surface remains relatively rigid, stress can develop around individual fixing points.
Signs to Check
- Several screw pops along the same stud line
- Small cracks near fixing points
- New pops appearing after environmental changes
- Slight movement or unevenness in the wall
In this situation, the visible screw pop may be caused by movement behind the board rather than a finishing problem alone.
2. Wet or Shrinking Timber
Timber that contains excess moisture can change dimension as it dries.
A drywall screw may initially feel secure, but as the timber changes shape or shrinks, the board may lose some of its original contact with the framing.
That movement can place additional stress around the screw head.
What to Look For
- Multiple pops on timber-framed walls
- Warped or twisted studs
- Slight gaps behind the board
- Several fixing problems in the same area
Stable, sound framing helps reduce the chance of later board movement.
3. Incorrect Screw Driving Depth
Drywall screw depth is important for both holding performance and surface finishing.
The screw head should normally sit slightly below the board surface while keeping the paper facing intact.
If the Screw Is Overdriven
Possible signs include:
- Torn paper around the screw
- Screw head buried deeply in the board
- Damaged gypsum core
- Reduced support around the fixing point
If the Screw Is Underdriven
Possible signs include:
- Raised screw head
- Visible bump before finishing
- Uneven joint compound
- Poor surface finish
Correct screw seating helps create a secure fixing without unnecessarily damaging the drywall surface.
4. The Screw Missed the Stud
A screw can pass through the drywall without properly engaging the framing behind it.
The screw head may initially appear to be in position, but without proper framing engagement it cannot provide a reliable fixing.
How to Identify It
Look for:
- Screw turning without tightening
- Very little resistance while driving
- Board not pulling firmly against the framing
- Loose screw
- Nearby screws holding while one fixing remains ineffective
A screw that has missed the framing should not be relied on as a secure fixing.
5. The Drywall Board Was Not Tight Against the Framing
Even when a screw reaches the framing, problems can develop if the board is not held firmly against it during installation.
A small gap between the board and stud may allow later movement.
Possible Causes
- Uneven framing
- Warped drywall board
- Debris between the board and framing
- Board not pressed firmly during installation
- Misaligned framing members
Repeated movement around a loose section can contribute to visible fixing problems.
Good board-to-framing contact should be established before the screw is finally seated.
6. Incorrect Screw Spacing
The fixing pattern helps distribute support across the drywall board.
If screws are spaced inconsistently or important fixing positions are missed, parts of the board may have more opportunity to move.
Possible issues include:
- Large gaps between fixing points
- Missing screws
- Irregular fixing lines
- Incorrect wall or ceiling fixing pattern
- Fixings placed in damaged board areas
The required screw spacing should follow the approved board system, framing arrangement, project specification, and applicable installation requirements.
7. Unsuitable Screw Selection or Poor Fixing
The screw should match the framing material and the complete drywall system.
Important factors include:
- Framing material
- Thread type
- Screw length
- Board thickness
- Number of board layers
- Required penetration
- Wall or ceiling application
- Project specification
Coarse-thread drywall screws are commonly used with suitable timber framing.
Fine-thread drywall screws are commonly used with compatible light-gauge metal framing.
The correct choice should always be based on the actual system requirements rather than the appearance of the screw alone.
Quick Screw Pop Diagnosis Table
| What You Notice | Possible Cause | What to Check |
|---|---|---|
| Several pops in one straight line | Framing movement | Stud or framing condition |
| Deep screw head with damaged paper | Overdriving | Screw seating depth |
| Raised screw head | Underdriving | Final screw position |
| Screw feels loose | Missed or weak fixing | Framing engagement |
| Board moves when pressed | Poor board contact | Gap behind drywall |
| Multiple random fixing problems | Spacing or installation issue | Fixing pattern |
| Pops appear as timber changes | Timber movement | Framing moisture/stability |
This table is useful for initial troubleshooting, but the actual cause should be confirmed before repair.
How to Identify the Cause of a Screw Pop
Not every drywall screw pop has the same cause.
A few simple checks can help narrow down the problem.
Is only one screw affected?
A single screw pop may indicate a local fixing problem.
Are several pops in a straight line?
This may point to movement or an installation issue along the same framing member.
Is the screw head deeply buried?
The screw may have been driven too far into the board.
Does the drywall move when pressed?
There may be a gap or poor contact between the board and framing.
Does the screw feel loose?
The screw may not have engaged the framing securely.
Is the wall timber framed?
Moisture-related movement or timber shrinkage may need to be considered.
The visible surface provides clues, but the actual cause may be behind the drywall.
Screw Pops in Walls vs Ceilings
Drywall screw pops can occur in both walls and ceilings, but the contributing conditions may differ.
Screw Pops in Walls
Possible causes include:
- Timber movement
- Missed studs
- Poor board contact
- Incorrect driving depth
- Inconsistent fixing
Screw Pops in Ceilings
Possible causes include:
- Board movement
- Framing movement
- Poor board contact
- Incorrect screw seating
- Inappropriate fixing pattern
- System installation problems
Because ceilings support boards overhead, the approved ceiling fixing system should always be followed carefully.
How to Prevent Drywall Screw Pops
Prevention starts before the first screw is installed.
1. Inspect the Framing
Check that framing is:
- Stable
- Straight
- Properly aligned
- Structurally sound
- Suitable for the board system
Damaged or unstable framing should not be ignored.
2. Keep the Board Tight Against the Framing
Before driving screws, make sure the drywall is firmly seated against the framing.
Avoid fixing over:
- Debris
- Large gaps
- Warped framing
- Uneven surfaces
3. Select the Correct Screw
Choose the screw based on:
- Framing material
- Thread type
- Board thickness
- Screw length
- System requirements
4. Use the Correct Screw Length
Consider the complete assembly rather than selecting length by appearance alone.
Check:
- Board thickness
- Number of layers
- Framing material
- Required engagement
- Project specification
5. Control Screw Driving Depth
Create a shallow recess while keeping the drywall paper facing intact.
Avoid:
- Overdriving
- Underdriving
- Excessive final driving speed
6. Follow the Required Fixing Pattern
Do not guess screw spacing.
Use the fixing pattern specified for the wall or ceiling system being installed.
7. Inspect Before Finishing
Before joint treatment begins, check for:
- Raised screw heads
- Deeply driven screws
- Torn paper
- Loose screws
- Missed framing
- Spinning screws
- Loose board sections
- Irregular fixing lines
Finding installation problems early can reduce unnecessary rework later.
What Should You Do When You Find a Screw Pop?
The correct repair depends on why the screw pop occurred.
Simply covering the area with additional joint compound may hide the mark temporarily without correcting the fixing problem.
A better process is:
- Identify the likely cause.
- Inspect the framing and board condition.
- Check whether the board is firmly supported.
- Examine the existing fixing point.
- Follow the approved repair procedure for the drywall system.
- Provide a sound replacement fixing where required.
- Repair the surface after the fixing problem has been corrected.
If repeated screw pops are associated with significant framing movement, moisture, or widespread board movement, the underlying condition should be addressed rather than treating only the visible surface.
Quick Prevention Checklist
Before finishing the drywall, confirm:
- Framing is sound and stable
- Drywall sits firmly against framing
- Correct screw type is used
- Screw length is suitable
- Screws properly engage framing
- Screw heads are correctly seated
- Paper facing remains intact
- Fixing pattern follows system requirements
- No screws are spinning
- No loose board sections remain
- Final inspection has been completed
Frequently Asked Questions
Why do drywall screws pop out after installation?
Drywall screw pops can occur because of framing movement, timber shrinkage, incorrect screw depth, loose board contact, missed framing, or other fixing problems.
Are drywall screw pops normal?
An occasional screw pop can occur, but repeated or widespread pops may indicate an installation or framing problem that should be investigated.
Can overdriving cause drywall screw pops?
Overdriving can damage the drywall paper facing and reduce the effectiveness of the fixing, which may contribute to later movement around the screw.
Can wet timber cause drywall screw pops?
Timber can change dimension as moisture conditions change. That movement may affect board contact and contribute to visible fixing problems.
Can poor screw spacing contribute to screw pops?
Incorrect or inconsistent fixing patterns can allow parts of the board to move more than intended. The approved spacing requirements for the specific drywall system should be followed.
Why do drywall screw pops sometimes appear in a straight line?
Several pops along the same line may indicate movement or fixing problems associated with the same framing member.
Should I simply tighten a popped drywall screw?
Not necessarily. The underlying cause should be identified first. If the original fixing point is ineffective or the board is moving, tightening the same screw may not correct the problem.
Can drywall screw pops occur in ceilings?
Yes. Ceiling screw pops may be associated with board movement, framing movement, incorrect screw seating, poor board contact, or fixing-pattern problems.
Final Takeaway
Drywall screw pops are not always just a cosmetic finishing issue.
They can be a visible sign that the screw, drywall board, or framing has moved after installation.
The most common causes include:
- Framing movement
- Timber shrinkage
- Incorrect screw driving depth
- Missed framing
- Poor board contact
- Incorrect fixing patterns
- Unsuitable screw selection
The best approach is:
Identify the cause → inspect the fixing → correct the underlying problem → repair the finish.
Careful framing preparation, appropriate screw selection, controlled installation, correct fixing patterns, and final inspection can all help reduce the likelihood of drywall screw pops.